 Working with Camera Animations in 2D View
Working with Camera Animations in 2D ViewPath edits are clearly distinguished from key frame edits.
This concerns the paths for cameras, lights and objects, as well as the relevant pop-up menus.
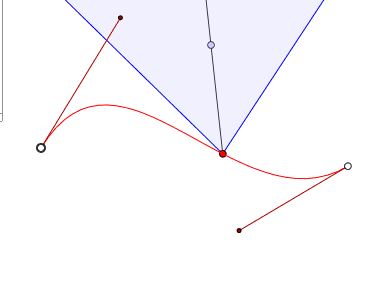
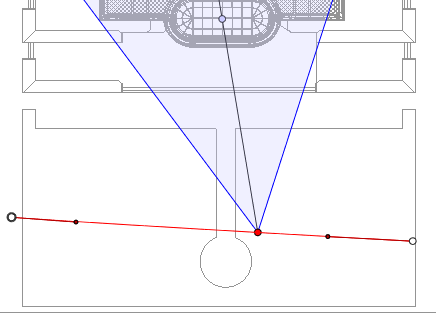
The Camera path is in red.
 NB: Camera target points can be edited graphically at any time, regardless of whether the record mode is on or not.
 tool in the window bar to select the mode.
Button pressed: Path editor is active (as a result, the key frame editor is inactive in the view).
 Example: Creating and Editing a Camera PathExample: Editing the Camera Target
In ![]() mode, move the camera viewpoint.
mode, move the camera viewpoint.
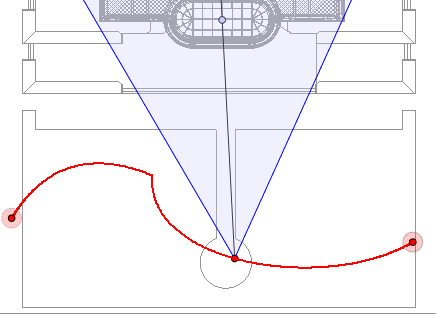
This draws a red path in a straight line.
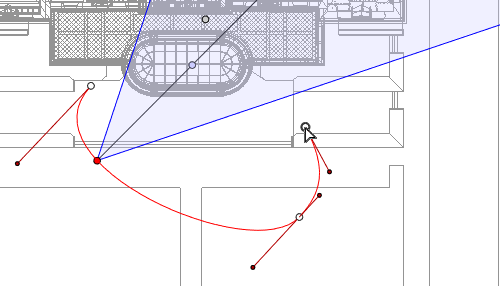
White dots circled in gray indicate the start and end points that have tangents.
The tangent handles are indicated by red dots circled in black.
Click on the path and move it.
Use the handles to graphically edit the tangents.

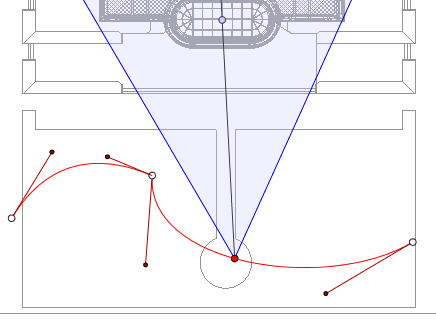
Right clicking on the red path line and selecting "Add Control Point" displays a gray circle and a tangent with two editing handles.


Right click on the point and select "Unlock Tangent" to create an inflection point on the path.


Example
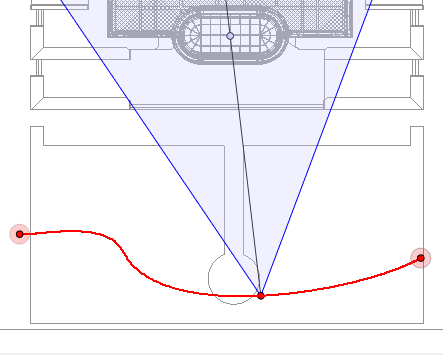
Right click on the point and select "Lock Tangent".


Example: Pausing and ResumingExample: Forwards and BackwardsExtends the path without altering the existing animation.

Example
NB: The Timeline can be used to play the sequence at any time.

Add Control Point: Adds an editable point to the path.
Delete Control Point: Deletes the point from the path (except the end points).
Close Path: Closes the path.
Open Path: Re-opens the path.
Delete Path: Deletes the path.
Example: Closing a Path
The Camera path is in red.
NB 1: You must be in record mode in order to edit elements in the Timeline.
Example
Add Key Frame: Adds a key frame.
Remove Key Frame: Deletes a key frame.
In ![]() mode, the button is released (not active).
mode, the button is released (not active).
In the Timeline window, click on record ![]() in 2D view, right click on the path, and select "Add Key Frame" from the pop-up menu.
in 2D view, right click on the path, and select "Add Key Frame" from the pop-up menu.

This creates the key frame.

The key frame can be moved graphically on the path, making it possible to speed up, slow down, etc.
NB: A key frame selected in 2D View appears with a red pin on the Timeline. A pause can be created in the movement of the element by duplicating a key frame in the Timeline.
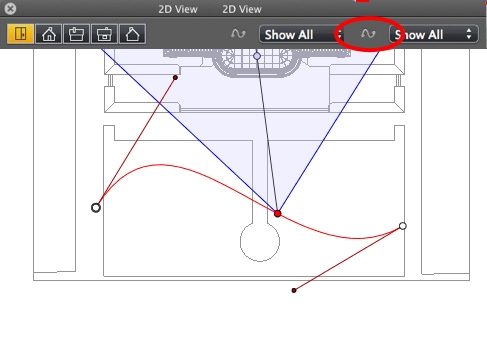
This displays and/or hides paths in order to improve editing in 2D View.
Right clicking on the white background of the 2D window displays the following pop-up menu, which makes it easier to edit in 2D View, as well as display and hide paths.

Show All: Displays all camera, light and object paths.
Show Only Current Type Elements: Depending on which inspector is active (Animations, Lights or Objects), this option displays all camera, light or object paths.
Show Only Current Element: Displays only the path currently being edited.
Regardless of whether the user is in path or time edit mode, right clicking on a camera's target or one of the blue lines that represent the focus opening will display a pop-up menu with the following options:

Duplicate: Duplicates the sequence; the current camera position becomes the default view and the path is not duplicated. Uses the original to create a new, superimposed viewpoint.
Add to: Perspectives View List.
Add to: Parallel Views List.
Add to: Panorama List.
Add to: VR Objects List.
Depending on the option selected, this step adds the current view from Perspectives to Parallel Views, Panoramas or VR Objects.
Edit Lights Activated With This Viewpoint:
Choose a light. The inspector palette switches to Lights mode and the light is selected.
Edit Active Heliodons With This Viewpoint:
The inspector palette switches to Heliodons mode and the heliodon is selected.
Delete: The viewpoint is removed from the list.
|
Artlantis User Guide:Working with Camera Animations in 2D View |
|
© 2016 Abvent www.artlantis.com |