 Editing the Clipping Box
Editing the Clipping Box
This is a blue box with corner handles that can be edited.
Available in every viewpoint of any viewpoint inspector Perspectives, Parallel Views, Panoramas, VR Objects and Animations.
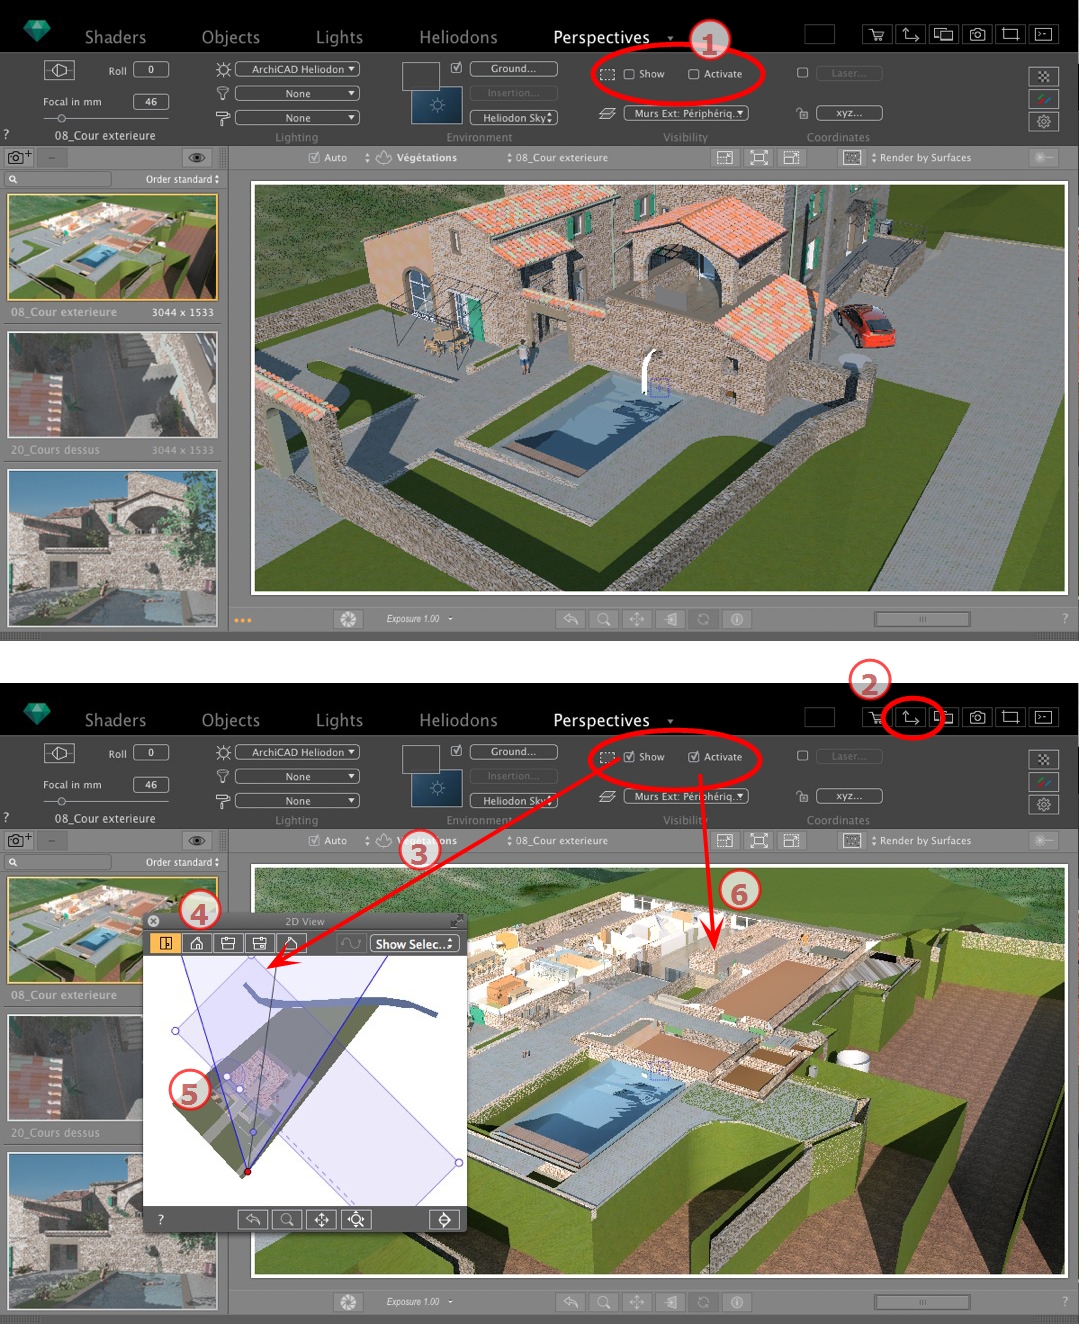
The check box Show concerns the 2D View only; the blue box is displayed or hidden in 2D View.
The check box Activate concerns the Preview only; the model is showed with or without cutting planes.
Displays the 2D View Window.
Check Show in the inspector and the clipping box is displayed in the 2D View.
Change the view (above, front, right, left or back) to define more than one clipping plane in the space (up to a maximum of six clipping planes).
Edit the blue handles or sides to define the clipping planes.
Elements outside the blue box are excluded from the scene.
Pivots the box within the plane. The box can be also manipulated graphically in the Top view.
Check Activate in Preview and the model is shown clipped; the shadows cast are adapted.
 NB: The above steps can be completed in a different way.
|
Artlantis User Guide:Editing the Clipping Box |
|
© 2016 Abvent www.artlantis.com |