 Creating a Shader
Creating a ShaderThis is done using an existing Shader, either:
In the Shaders Inspector: one click on the tool  .
.
Or by right clicking on the name of a 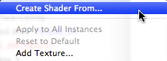 material and selecting the option Create Shader From...
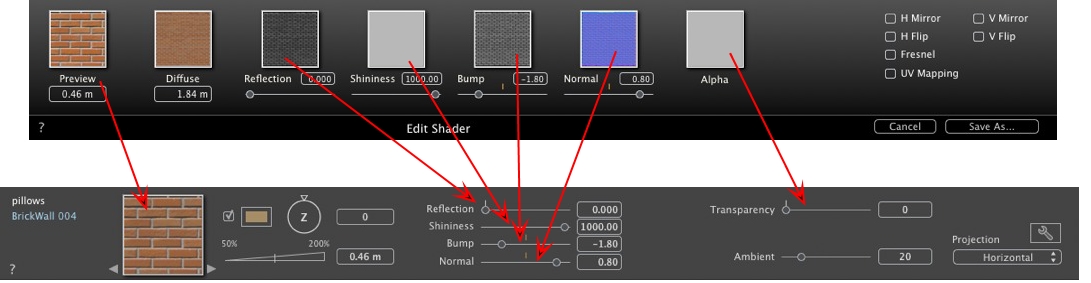
The edit dialog opens with the image of the current Shader. If the current Shader is a procedural, the dialog is empty.
The dialog must be populated with images and values. Do this by dragging and dropping where appropriate or by double clicking on the thumbnail to open a dialog in which you can choose an image.
Once stored, the new Shader will appear as a Standard Shader.

This is the thumbnail that appears in the Shaders Inspector and in the thumbnail field of the Catalog.
The thumbnail representing the Shader must be a 128 x 128 pixel jpeg file.
The width of the thumbnail provides, in the current unit, the size of the image to a scale of 1.
 NB: If you do not provide a thumbnail, Artlantis will use the diffuse image resized to 128 x 128 pixels.
The image must be present. This is the visible part of the Shader. Depending on the pattern, we recommend an image size of 512 x 512 or 1024 x 1024 pixels.
NB: If the image is not square, Artlantis will stretch it to make it square.
The diffuse width gives the image, in the current unit, to a scale of 1.
Depending on the representation, this size may differ from the preview thumbnail. The diffuse image does not necessarily feature the same image as the thumbnail.
NB: The diffuse image is four times the size of the thumbnail image, but its pattern is 3 x 3 the size of the thumbnail in order to avoid a repeat effect.
The diffuse image is not visible in the Shaders Inspector, but is displayed in the Catalog Preview field.
The image is optional. It is generally in grayscale but may be in color.
Its size in pixels must be the same as the diffuse image. Otherwise, Artlantis will stretch it depending on the size of the diffuse image.
The purpose of the reflection image is to modify the value of the reflection cursor:
In black pixels, the slider value is multiplied by 0.
In white pixels, the slider value is multiplied by 1.
In intermediary pixels, the slider value is multiplied by the intermediary value.
It is useful to limit the effects of reflection at certain parts of the diffuse image.
NB: The slider is limited to a minimum and maximum value of 1. For example, entering a value of 0.25 will define a slider that will range from a minimum of 0 to a maximum of 0.25.
You can test the effects of each of the settings in real time in the Preview window.
The image is optional and should be in grayscale.
Its size in pixels must be the same as the diffuse image. Otherwise, Artlantis will stretch it depending on the size of the diffuse image.
The Shininess image is used to modify the slider values from 1 to 1,000.
If the Shader has no Bump image, the slider will be available in the Shaders inspector and Artlantis will use the diffuse image to provide bumps. Hence, the bump image will always be available and will use less system memory. Values range from -1 to 1.
The image is optional. The colors use strict rules to define the bump simulation. Generally, it replaces Bump, but Artlantis can support both. Values range from -1 to 1.
Important: It is not simple to create a "Normal" image. If the Shader has no Normal image, the slider will be disabled in the Shaders Inspector.
The image is optional and should be in grayscale.
It is used to simulate holes and transparencies in the Shader.
In black pixels, the Shader is opaque.
In white pixels, the Shader is transparent.
Horizontally and/or vertically inverts the texture with a mirror option between two repetitions.
Add a Fresnel transition effect between Reflection and Diffuse.
Checks for UV mapping projection. Maintains the texture coordinates on an object coming from software that manages UV maps.
Opens the Save As dialog. Enter the name of the Shader. This name will appear in the top left-hand corner of the inspector.
Some Basic Shader settings are not available in Create Shader: Rotation, Mix Color, Transparency, Projection Options and Materials Identifiers have default values.
Example: Split Material by Mesh
 Example: Create Shader
|
Artlantis User Guide:Creating a Shader |
|
© 2016 Abvent www.artlantis.com |