 Adding Textures
Adding TexturesA texture is an image or sequence that is imported onto a material. A material can have one or more textures.²
Right clicking on the name of the material 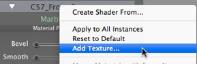 and selecting the Add Texture... option.
By dragging and dropping the texture thumbnail from the Catalog to a material in Preview mode or in the list.
Dragging and dropping the texture from a location on the hard drive onto a material in Preview or in the list.
Using the Delete background key.
Right clicking the name of the texture and selecting Delete in the pop-up menu.

For a material, this can be used to navigate between related Shader and Textures editors.
Displays the thumbnail of the selected Texture. The blue cross represents the anchoring point of the texture. Clicking in the image repositions this point.
Check and click on the selector to choose a color.
Use the circular cursor (Shift + Click, increments every 15°) to turn the texture on its axis or enter a value in the related field.
The slider changes the texture scale from 50 to 200% of the current size. Or enter a value in the related field.
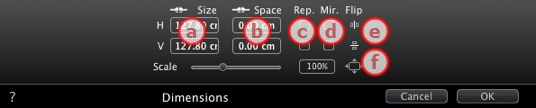
Enter the size of the texture, clicking on  retains the proportions. Click again to cancel the limitation.
Used for repeated textures. Defines the size of the spacing between each repetition.
Enter a spacing value as H and/or V. Clicking keeps the same proportions. Click again to cancel the limitation.
Duplicates the texture along the horizontal and/or vertical axis.
Horizontally and/or vertically inverts each duplication.
Horizontally or vertically inverts the texture with a mirror option between two repetitions.

The texture is automatically adjusted to cover the maximum surface of the material horizontally and/or vertically.
Move the slider to change the reflection or enter a value in the related field. When the diode is red, the texture reflects its environment.
Double click on the red diode to cancel the effect.
Entering a Limit value defines the maximum distance of the reflection.
Use the slider or enter a value in the Shininess field.
Use the slider or enter a value in the related field to simulate the effect of bumps or hollows on the surface of the material using the levels of gray contained in the image.
Double click on the diode to cancel the effect.
Normal mapping gives a distorted appearance to any element reflected in the texture. Use the slider or enter a value in the related field to simulate the distortion.
Apply a level of transparency to the texture or enter a value in the related field. Click on the diode to cancel the effect.
Use Alpha Channel: Check the box to activate the transparency of the alpha channel.
Use a Transparency Color: Click on the selector to choose a transparency color. Check the box to activate it.
Use the slider or enter a value in the related field.
Adjusts the image to the surface on which it is placed. Automatically selects the settings best suited to the project.
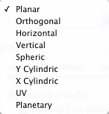
Planar: Is applied to a plane.
Orthogonal: Is applied to an element. If the element is composed of surface planes, the texture follows the surface planes.
Horizontal: The Shader is required to be set horizontally.
Vertical: Vertical projection on the element. The horizontal parts receive the image, while the vertical or tilted parts are stretched.
Spherical: Adopts a spherical form that depends on the size of the texture. It may therefore leave empty spaces.
Y Cylindric: The texture is projected around the axis of a vertical cylinder.
X Cylindric: The texture is projected around the axis of a horizontal cylinder.
UV: Maintains the texture coordinates on an object coming from software that manages UV maps.
Planetary: Vertical projection of the element while passing through the poles, without leaving spaces.
 Example: Editing a Texture
|
Artlantis User Guide:Adding Textures |
|
© 2013 Abvent www.artlantis.com |