Panorama Rendering and Playing
Panorama Rendering and PlayingEach rendered node is composed of six images saved in jpeg files. The file format of the panorama is html, and is played on a Web browser.
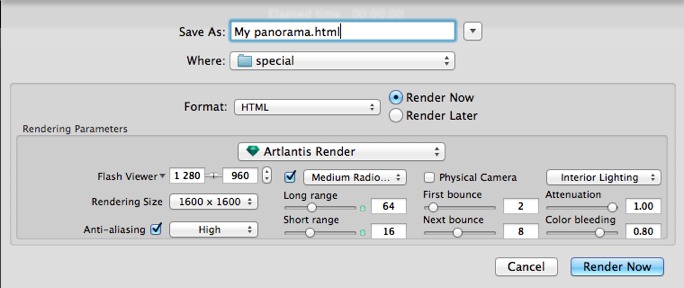
The rendered panorama:

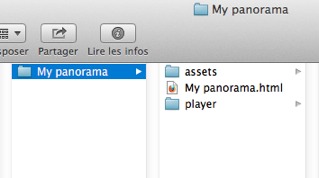
In the destination folder, a folder with the name of the panorama is created. Inside are two folders named assets and player and one html file with the name of the panorama.
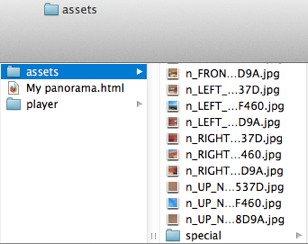
The asset folder contains all the jpeg square images of the panorama, a ivisit3d.xml file and a special folder.
The player folder contains the files necessary to read the panorama animation with a Web browser, including the Flash swf file.

Double clicking on the html file launches the current Web browser; the panorama is displayed in a browser window.
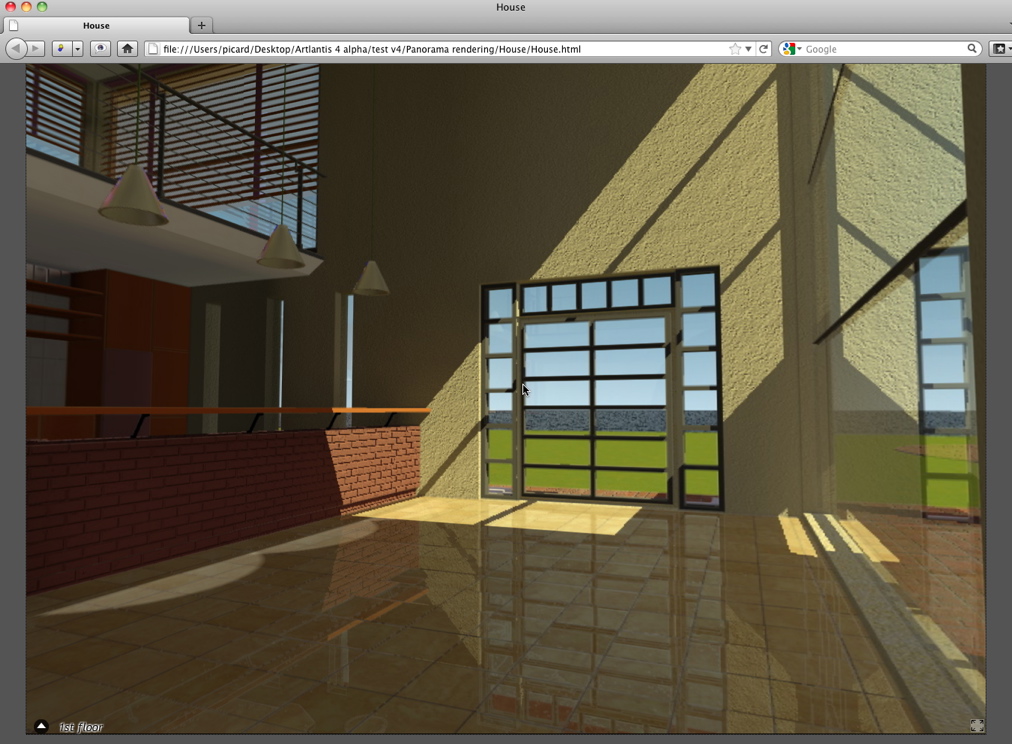
By clicking and dragging the cursor in the window, the camera turns 360° on itself.
There are two ways to switch from one node to another: One is by using the thumbnails list and the other is by using the sensitive triangles.
Move the cursor to the lower part of the html window; a drawer displays the thumbnails of the panorama nodes.

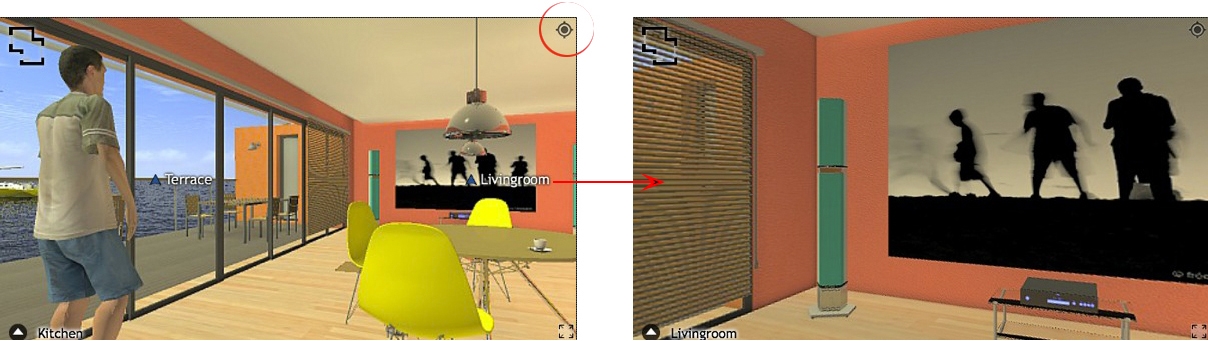
The sensitive points are the blue triangles followed by their names. Click on a triangle or its name to go to this node.
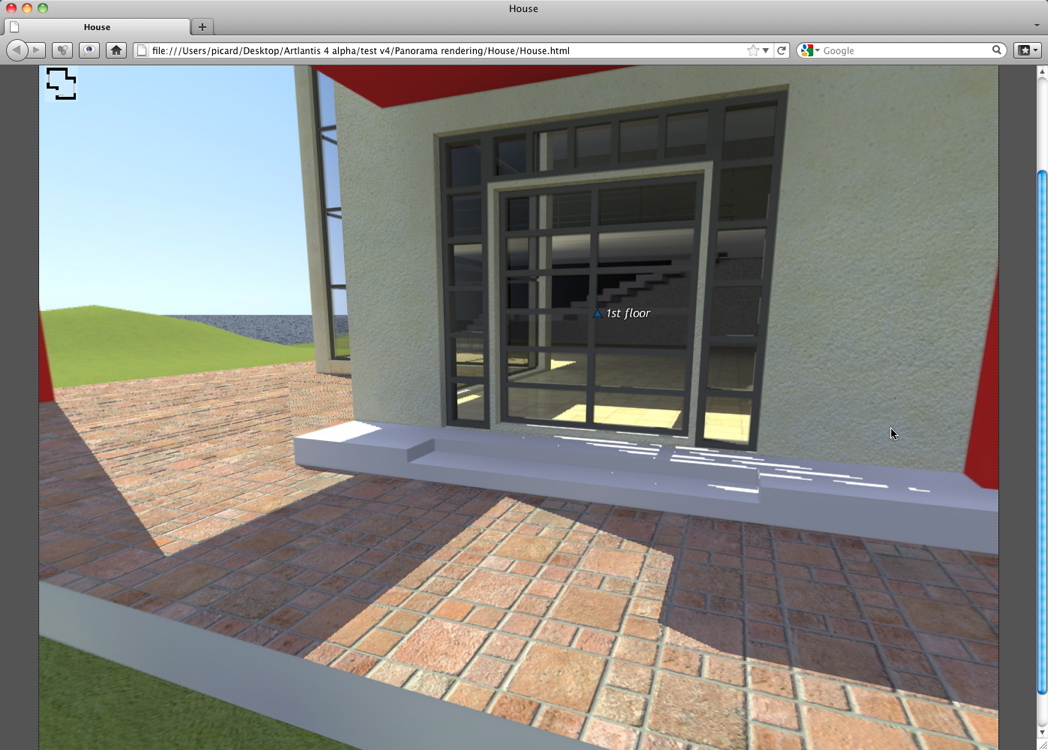
To display a full screen panorama, click on the icon  in the lower right-hand corner of the Web page.
When trying to read a panorama, an Adobe Flash Player Security alert is displayed.
Click OK to dismiss the message. If you want to avoid getting the alert again, create a folder in which you collect your panoramas; this folder will need to be declared as a trusted location for Flash Player.
To define a trusted location, click on Flash Player / Advanced tab / Trusted Location Settings... in the System Preferences, click on the + button and add the folder containing the panoramas.
 Tip: Declare a folder as a trusted location and place your panoramas inside this folder.
|
|
Direction tool option deactivated When you click on a node's name, the camera follows the direction of the red or green arrows as this was defined in the Artlantis 2D View.
|
|
|
Direction tool option activated When you click on a node's name, the camera keeps the direction of the previous node as defined by the user in the Flash Player.
Example: by clicking on the Living room sensitive point, the camera keeps the direction of the last node. |
Another way to navigate in a 3D base is to overlap to the 3D View on the associated plan level, then to navigate from one node to another by clicking on a sensitive triangle or name. Doing this switches to the corresponding node and hides the plan level.
Before rendering the panorama, we need to associate one or more plan levels.
The association of the plan levels with the panorama can be set automatically using the Panoramas Inspector.
In 2D View, display an elevation view (Front, Right, Left or Back). Set the viewpoint by moving the camera and the target. See "Working with Parallel Views in 2D View"
The viewpoint will refer to the higher part of the plan shown into the browser.
When launching the panorama a new button will be displayed in the left-hand corner of the window. 
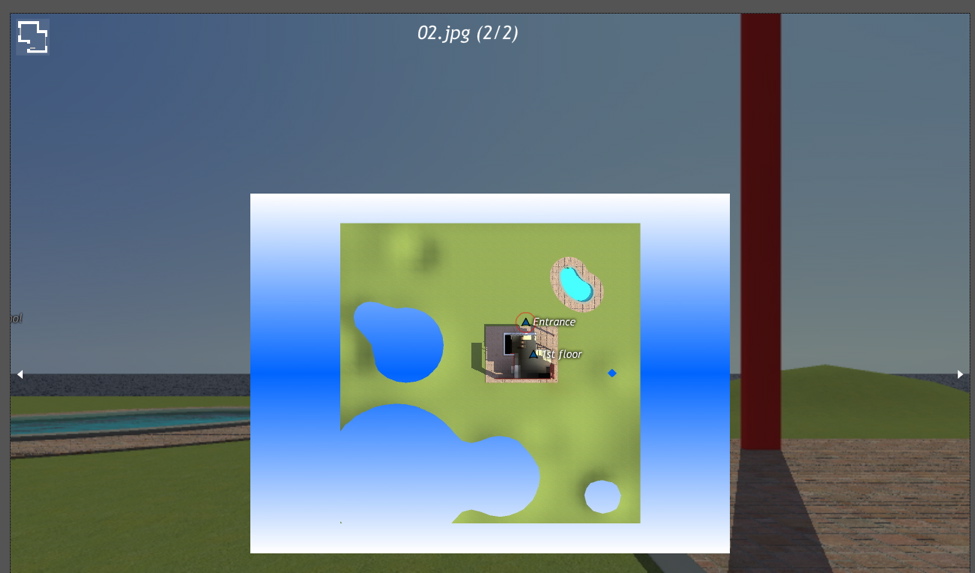
When the plan level is displayed, its name is shown at the top of the Web page.
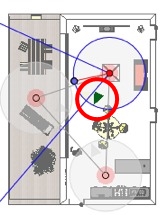
The sensitive nodes of the panorama are displayed on the plan. The current node is surrounded by a dynamic red circle. Clicking on a node will hide the plan and display the associated viewpoint in the browser window.
To navigate from level to level use the arrows located at the edges of the Flash Player.
Adobe Flash Player must be installed to read the panorama.
http://www.adobe.com/support/flashplayer/downloads.html
 NB: The nodes of the panorama are composed of six square images.
NB: To read your Panorama on an iOS or Android device you will need to generate a pno file using iVisit 3D Builder.
|
Artlantis User Guide:Panorama Rendering and Playing |
|
© 2013 Abvent www.artlantis.com |
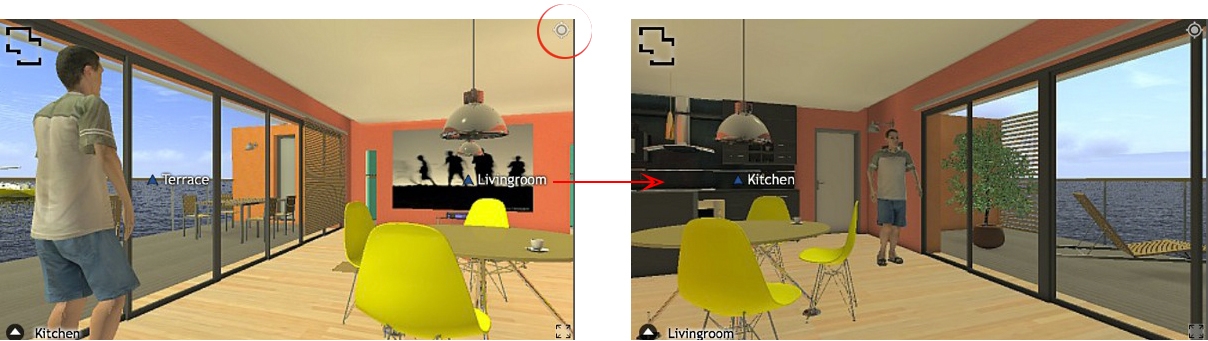

 Example: by clicking on the Living room sensitive point, the camera looks in the same direction as the green arrow set in 2D View.