 Site Insertion Tool Site Insertion Tool
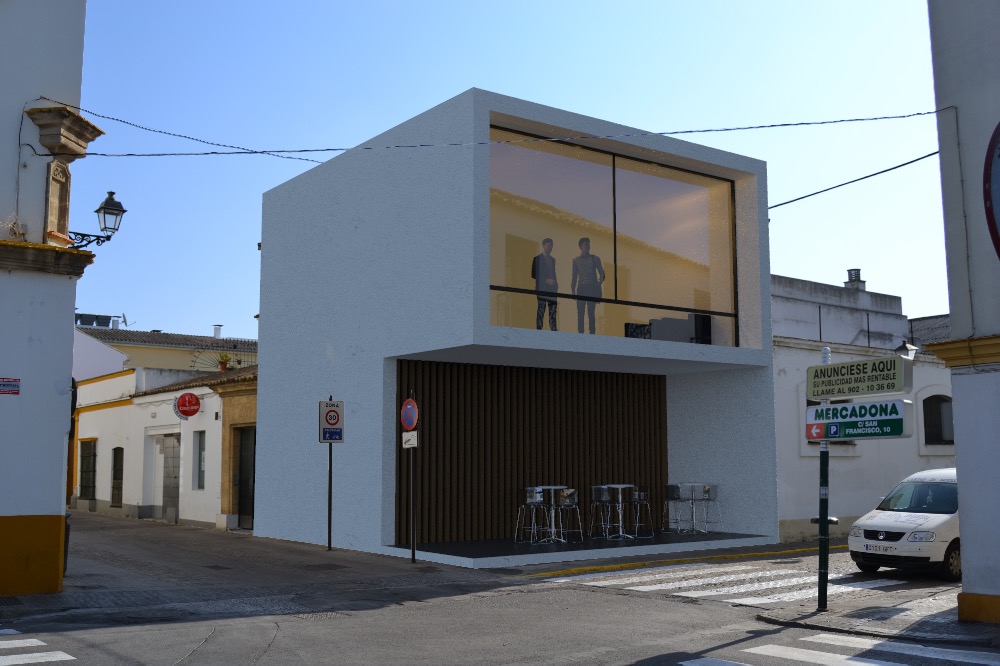
This tool allows you to position a camera to insert the 3D Model in the construction site photo.
Artlantis 2019 new Insertion Tool guides you through 5 steps to create this camera.

The 3D Model is open

1. BACKGROUND IMAGE

The rendering size will automatically be set to the picture size.
If the chosen image contains Exif meta-data, like date and place where the picture was taken, the « Create Heliodon » button will be enabled.
It will be added to the Heliodon list and activated with the current Insertion view.
Image luminosity can be adjusted using the « Power » slider; it affects only the image, not the model. Clicking on the yellow vertical line resets the value to zero. Values range from -100 to 100.
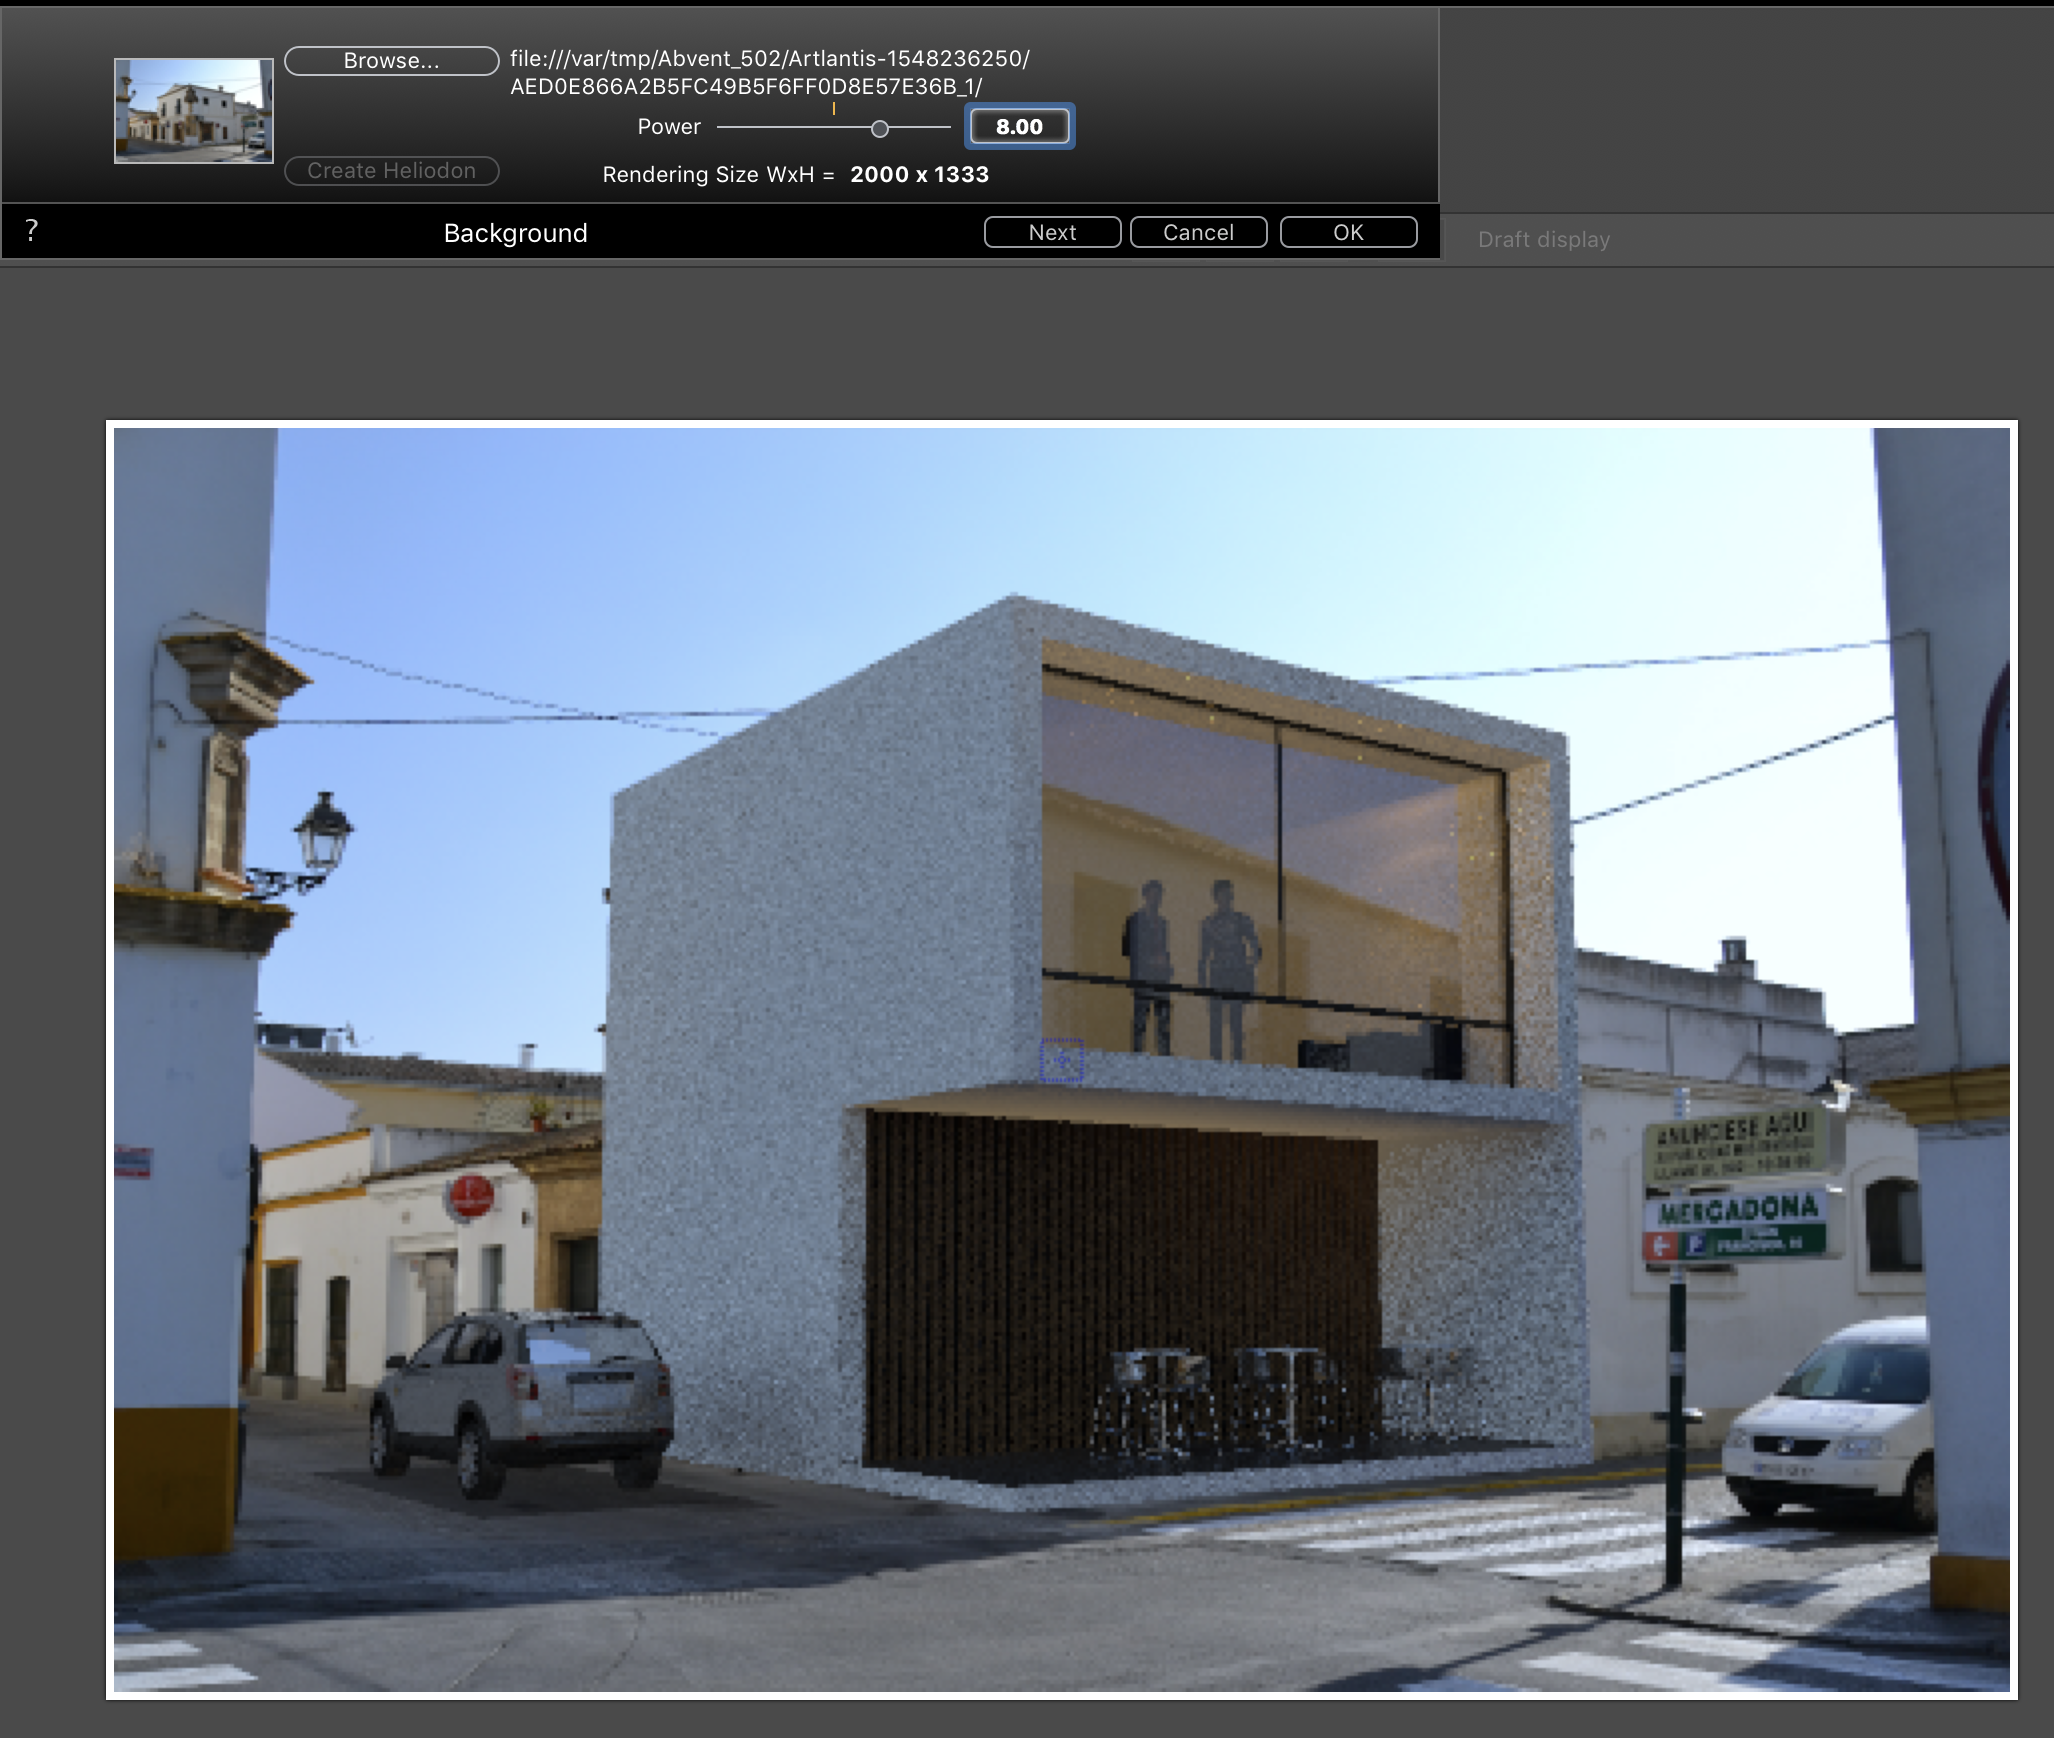
Click on the « Next » button to go to the next step.
2. FACADES

In the Preview window use the 6 handles (yellow, red and green dots) to position the Facades the way you wish to see them in the final render.
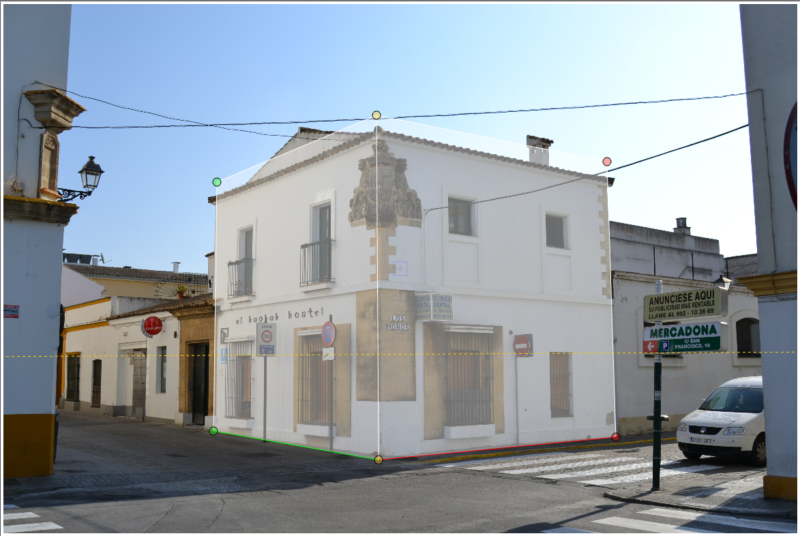
Click on the « Next » button.
NB: The red X axis, green Y axis and blue Z axis lines must never collide.
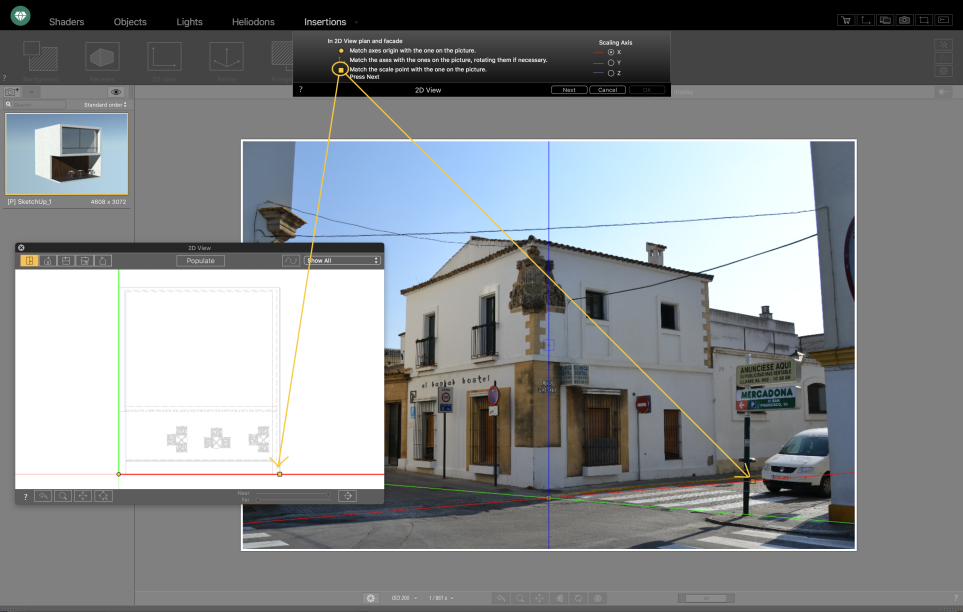
3. 2D VIEW
1- In the 2D Window, « Plan » and « Facade » views, position the Axis Origin (yellow dot), to match the one in the picture.
Match the origin of the axes with that of the photo Consists of placing in the 2D view AND in the preview window, the origin (  ) of the axes, this origin is the equivalent of the angle of the 3D model. so to indicate in the 2D window where is the angle of the model to insert and in the same way, to indicate in the preview window where is the angle of the 3D model.
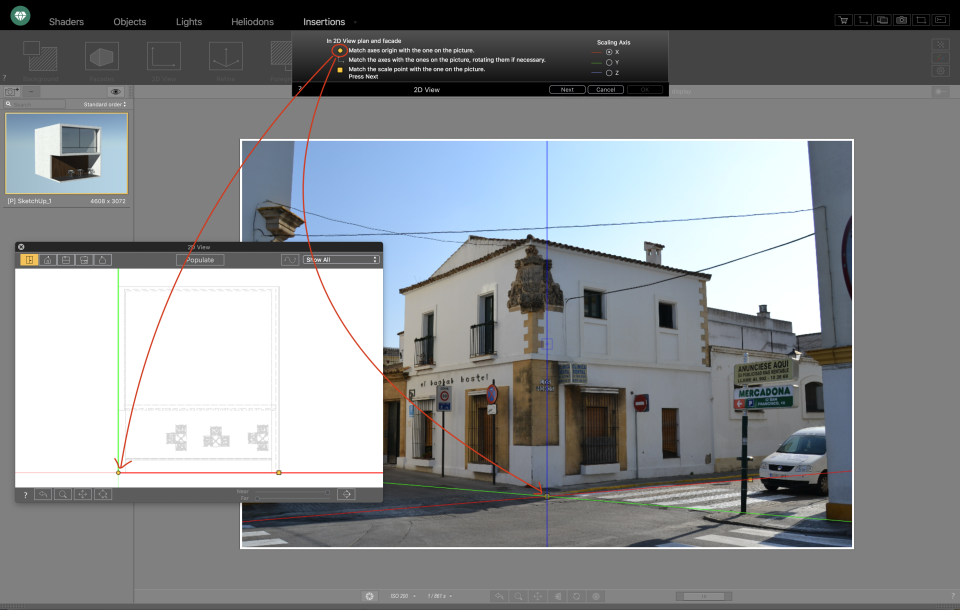
Match the axes with those in the image, turning them if necessary Consist of matching the axes (X: Red and Y: Green) with those defined in the preview window, which allows the model to be oriented correctly.
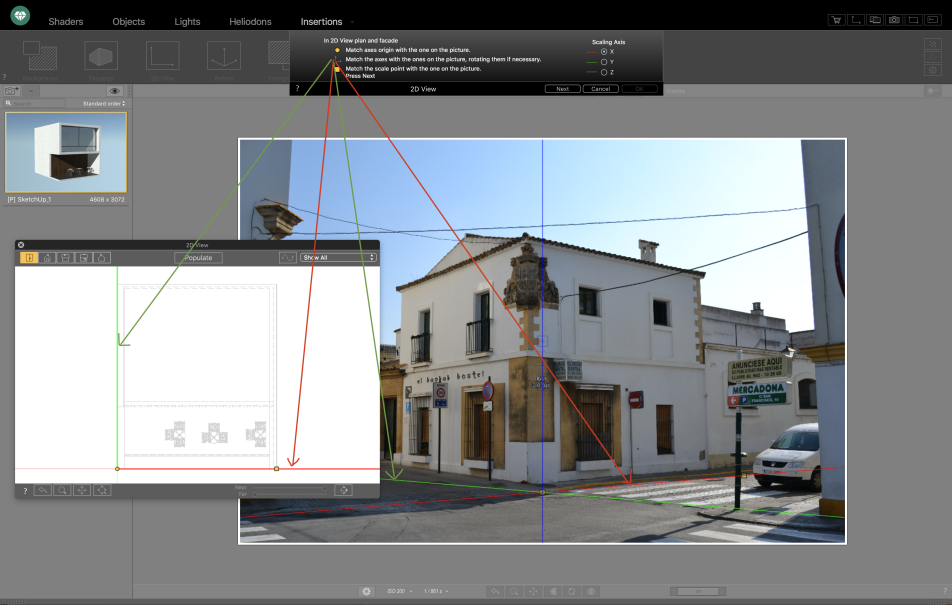
Match the scale point with that of the image. Move the scale point (  ) in the 2D view to the end of the front of the 3D model and do the same in the window. preview. You have to place the scale point where you want your model to stop on the background image. (Here the junction between the two buildings)
 Change axis and repeat the previous steps, using the different views of the 2D view
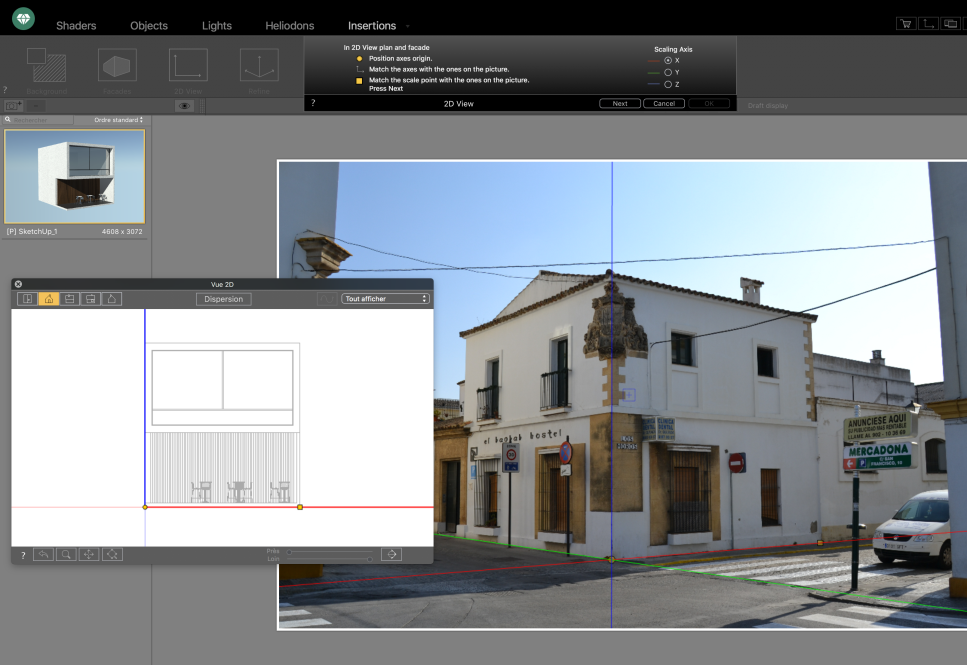
Click on the « Next » button, the camera will automatically move to the requested position by following the 3D axis position and scale.
5. FOREGROUND IMAGE (OPTIONAL)
To add realism you can add a foreground image, click on the « Foreground » button in the Insertion inspector.
It will open the foreground image standard dialog.

|
Artlantis User Guide:Site Insertion Tool |
|
© 2020 Abvent www.artlantis.com |